
An Arduino-based eight channel DIY prop controller
This project is the continuation of the legacy Four Banger project. It does everything that one did, with twice the channel outputs (and a few other bells and whistles)
WHAT IS IT? The OctoBanger project is a system of creating DIY animatronic prop controllers. It uses the widely available and cheap Arduino platform (UNO, Nano, Pro Mini). If you do not know what a prop controller is, go to Google and enter “animatronic prop controller”. Basically it is a device that will sync outputs (lights, relays, etc) with an audio track.
PINOUTS
This project has been modified to support multiple pinouts from a single firmware. This may seem confusing at first, but it allows a bit of flexibility to support different “form factors”.
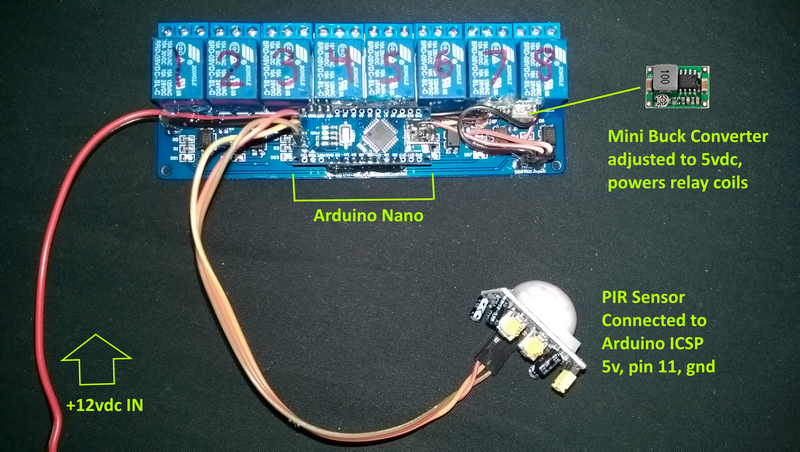
(Nano with 8 relays form factor)
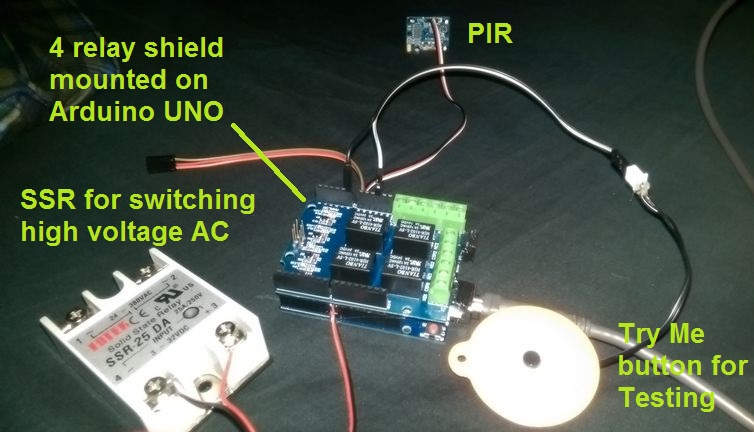
(Uno with 4 relay shield form factor)
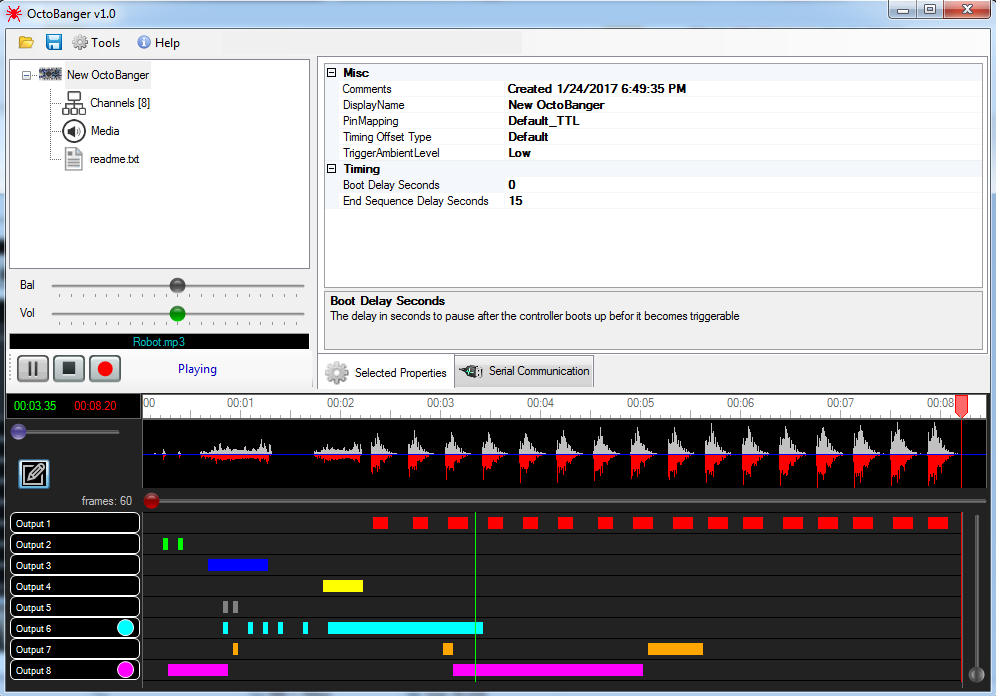
This is the FREE Octobanger configuration application. This PC-based application interface allows for much more precision timing than trying to program a controller using a manual keypad.
The interface also contains a built-in utility for uploading the included firmware to your Arduino (plus a few other gizmos)
Here is a sample video where I create a quick test project:
Please note- the download for this app is in the form of a zip file. You MUST unzip to run the application within.
Failure to do so will result in an error that mentions fmod.dll and the app will absolutely not run. Please unzip!
Download it Here:
![]()
Sample Project Document:
![]()
Here is some video taken while wiring the sample project:
Troubleshooting and Best Practices
**Update 9-4-2018** A big thanks to Kim Short for helping identify a bug that could cause an “endless scare loop” Thanks Kim! (download package has been updated) 🙂
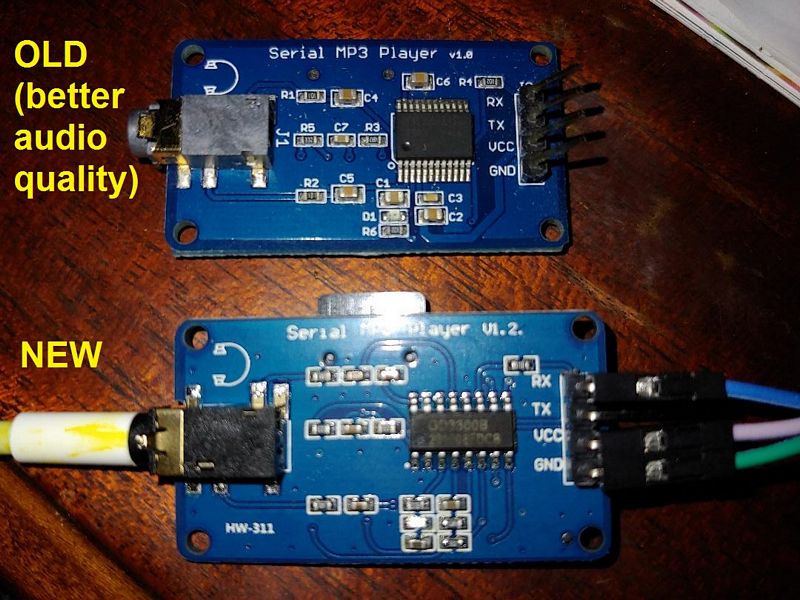
**Update 5-30-2021** I have had messages from a couple of folks who had trouble with new audio modules (like the Catalex, but not Catalex). These are marked with v1.2, use a different chip than the original yx5300, and do not say Catalex on them. The problem seemed to be that they did not kick off the scare audio track. I played around with the arduino code and added a band-aid that seems to work with both old and new modules. In my testing, I also noticed that the newer modules do not sound as good as the older modules. I would suggest finding a “real” Catalex module- there is a link to their store in the help menu of the app.
A second alternative is the DFPlayer mini, but this one doesn’t have a convenient headphone jack. The DF module is cheap, and it actually has a speaker-level output. If you have a small prop that doesn’t need to be really loud, this eliminates the need for an amplifier. One thing to keep in mind though, you should use a 1k resistor in series with the wire going to the RX pin. Also, if using the speaker-level output, make sure your 5v power supply has enough power to support the load.
Since this project involves using a microcontroller to switch electrical devices on and off, I would suggest taking the time to read up on this subject. Considerations for your controller will largely depend on the types of devices you want to turn on and off. There are a multitude of sites dedicated to these topics. Terry King’s Arduino pages are a great place to start:
http://arduino-info.wikispaces.com/ArduinoPower
http://arduino-info.wikispaces.com/RelayIsolation
Understanding the concepts in the pages above will help ensure the success of your project.
If this project has helped you to create an army of killer props at a fraction of the normal cost, and you are feeling like sharing a fraction of a fraction of all that $$$ you just saved, we’d appreciate your kindness! Your generosity will help keep this site up and running.

This project is what it is. As with any other freeware project, I receive a continuous stream of requests to make it do this and make it do that. If it does not meet your expectations, all I can do is remind you that it is free.
Cheers